
Blog
How to set up a grow room
Step-by-step to your own indoor grow
To cultivate the best plants yourself, some components and a little planning are necessary. Indoor plants need a stable and specific climate to develop well. This can only be ensured in a closed grow room or a special grow box. Here you can learn how to set up your own grow room step-by-step and thus become a successful indoor grower.
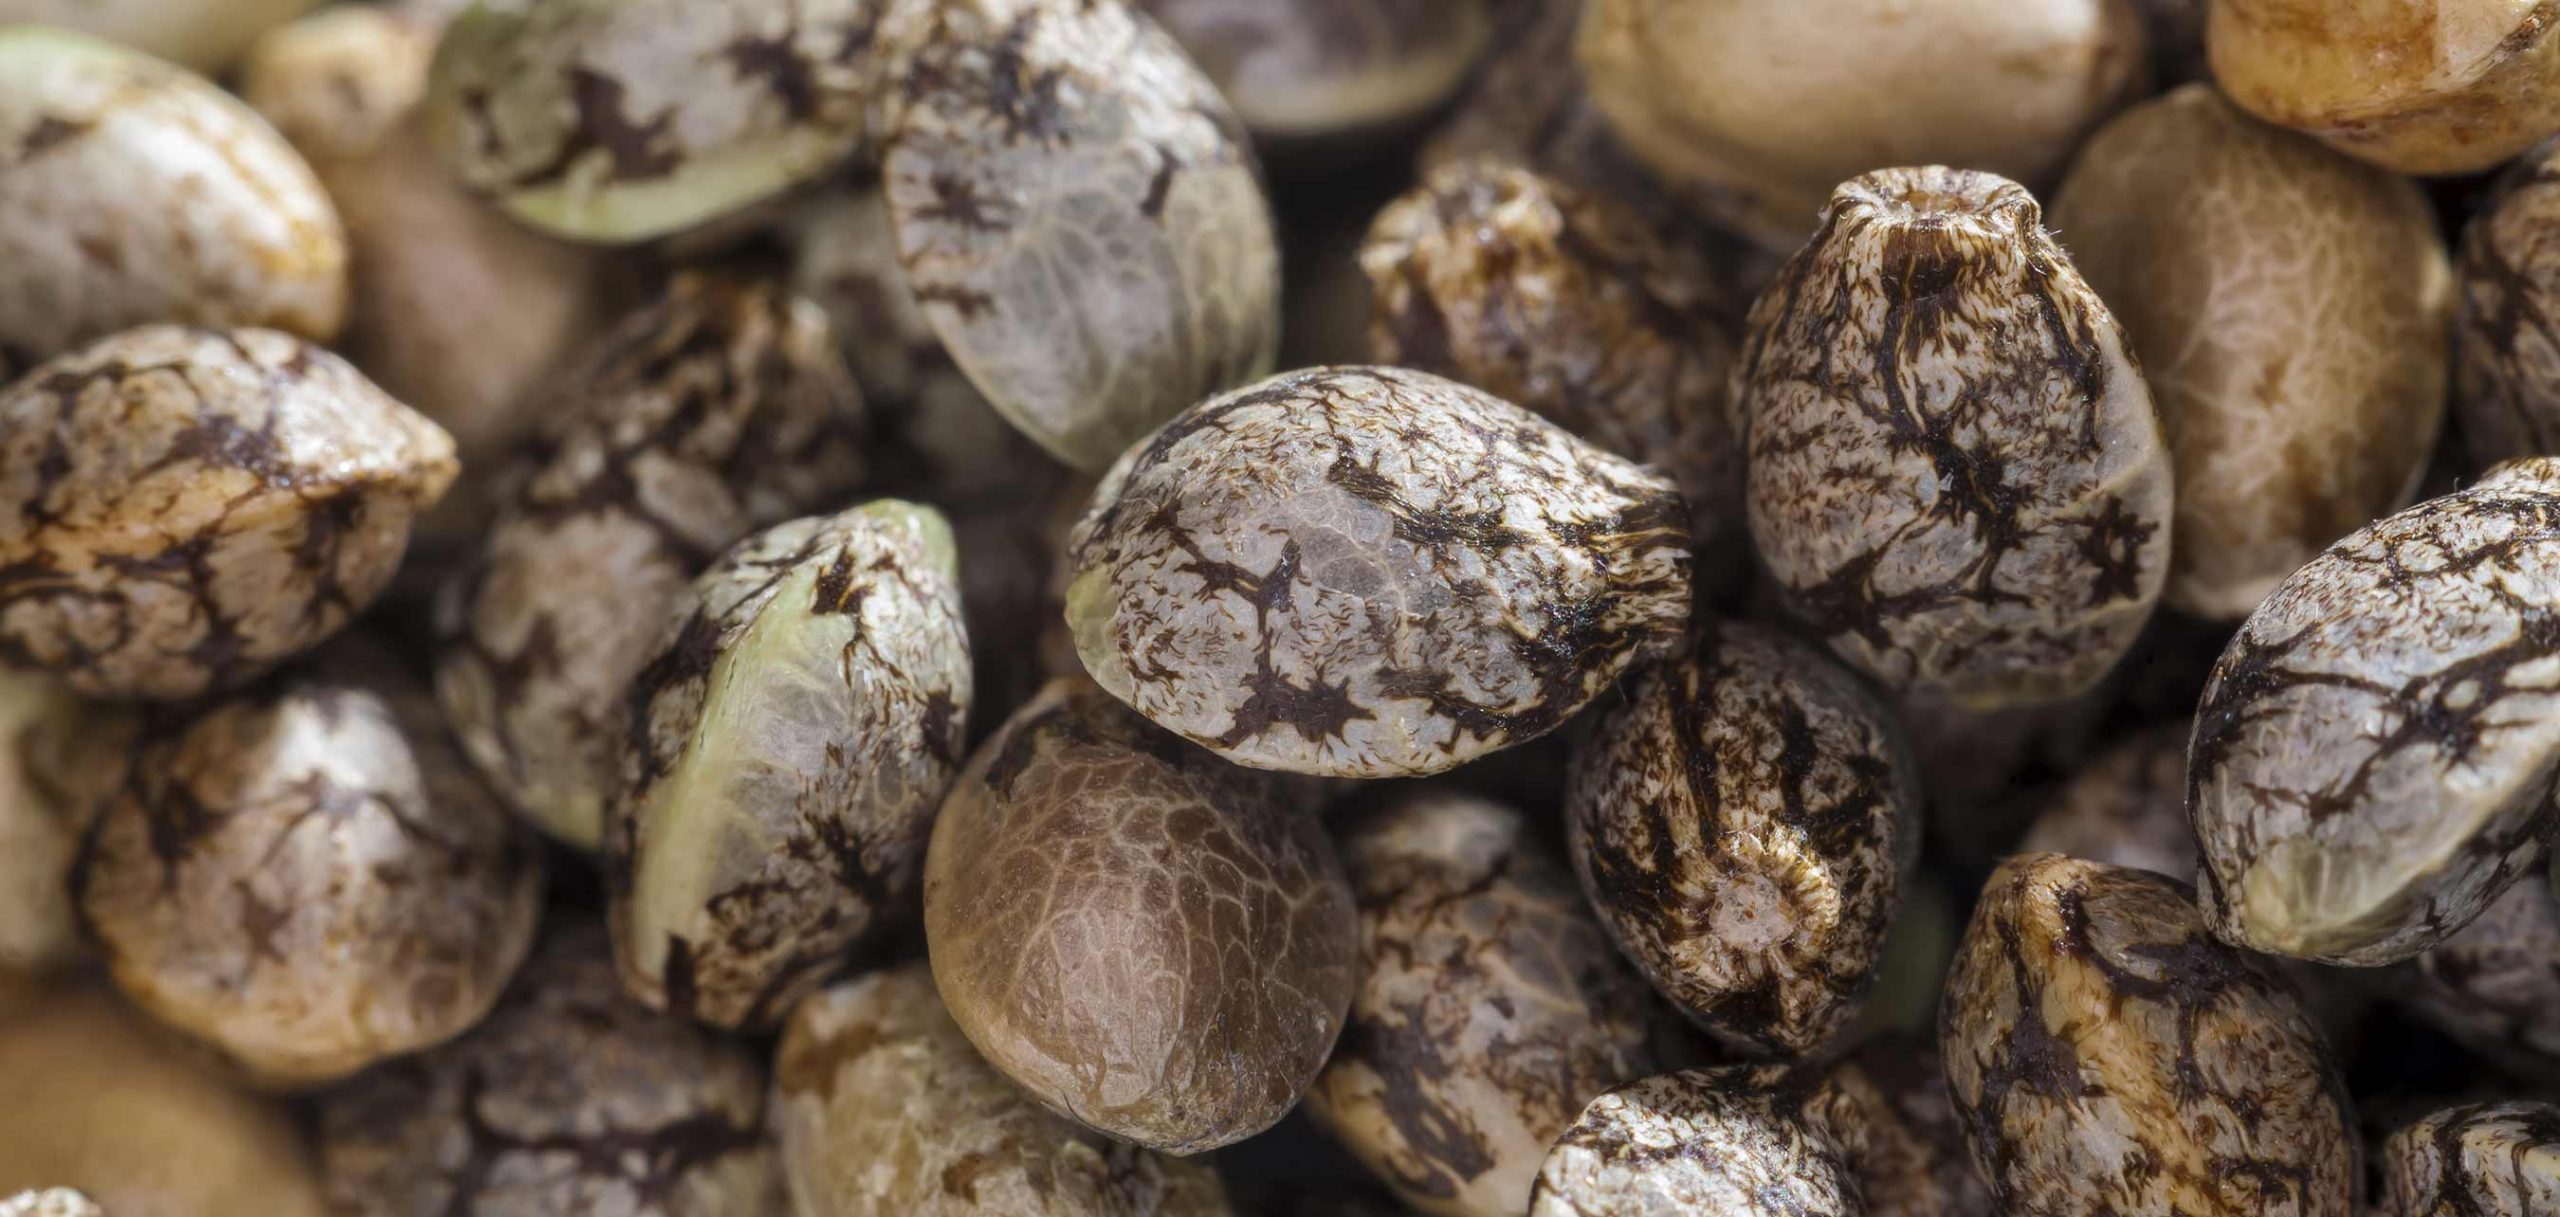
To set up a grow room or grow box, you will need various components (such as fans, plant lighting, etc.) and possibly tools. The size of the grow room determines how many plants can be grown in it. The size of the growing area also determines the wattage required and the number of lamps. As a rough guideline, you can say that 0.5-1g of flowers can be harvested per 1W of NDL light, provided everything runs as intended. A 200W NDL thus produces 100-200g of dry flowers under ideal growing conditions.
The right place to grow
There should be a water connection at the mounting location or nearby and also one (preferably 2 independent) sockets and an air outlet to the outside. This is often the biggest challenge. The used warm air from the grow room must be led outside. It is not always easy to create an unobtrusive air outlet without dismantling existing installations. You will learn more about this later.
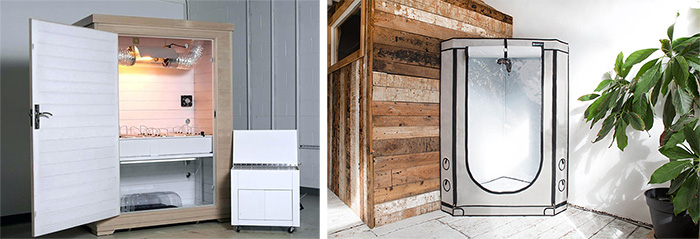
A converted and dry cellar can be a good place for the grow. The humidity and temperature can be controlled well in many cases and the grow box can be stored safely. Grow rooms and boxes in the attic are often more difficult. The heat can quickly become too high or the temperatures drop too much in winter if there is not enough insulation.
Barns and garages are among the least favourable cultivation sites for cannabis. Strangers can enter the building more easily and unnoticed. Often, grow tents or grow cabinets are set up and operated in the flat, bedroom or storage room. Here, the parameters are relatively easy to control. However, visitors might see the system unintentionally more quickly. Tip: Avoid installing your grow room where your central heating, electricity box for the whole flat/house is located or the like, bear in mind that if repairs are needed here, you might have to dismantle the entire cabinet including plants and it could get quite complicated.
The budget
Next is the budget you can spend on the grow room. If you only have a small budget, you can save on some points, but you can't do without certain equipment. The costs vary greatly depending on the equipment you choose.
You can also build one Growbox from wood, chipboard or MDF boards. This has the advantage that the box can be individually adapted, camouflaged under the stairs or integrated in other places and space is used sensibly. But: after all the calculations, a self-built box is never cheaper than a ready-made grow tent, which is also easier, faster and can be set up without prior knowledge. An exception would be if you already have material at home and don't need to buy it. You can buy all kinds of Grow tents and you will find a large selection in our range.
Plan the grow room
Once you have decided how many plants you want to grow, you can either buy a complete kit that already contains all the necessary parts properly coordinated or you can start planning the grow room:
The Grow Light
The indoor grow room is a closed growing system within which the lighting of the plants can be easily regulated and controlled. You should make sure that no sunlight or artificial light can shine into the box during the night (when the lights are off). Always close the grow room door tightly and check homemade grow cabinets for gaps and cracks where light might shine through.
Every plant needs light for its photosynthesis, without which it cannot grow. To replace sunlight in the indoor garden, we need a sufficiently strong artificial light.
A grow room with a growing area of 80 x 80cm or 100 x 100cm needs at least one 400W NDL lamp or equivalent. Plant LEDFor a growing area of 100 x 100 cm or 120 x 120 cm a 600W-NDL is ideal. You could also use less wattage, but this would have a strong impact on the yield and the quality of the harvest.
5% more light causes 5% more growth/yield
Installing the plant lamp
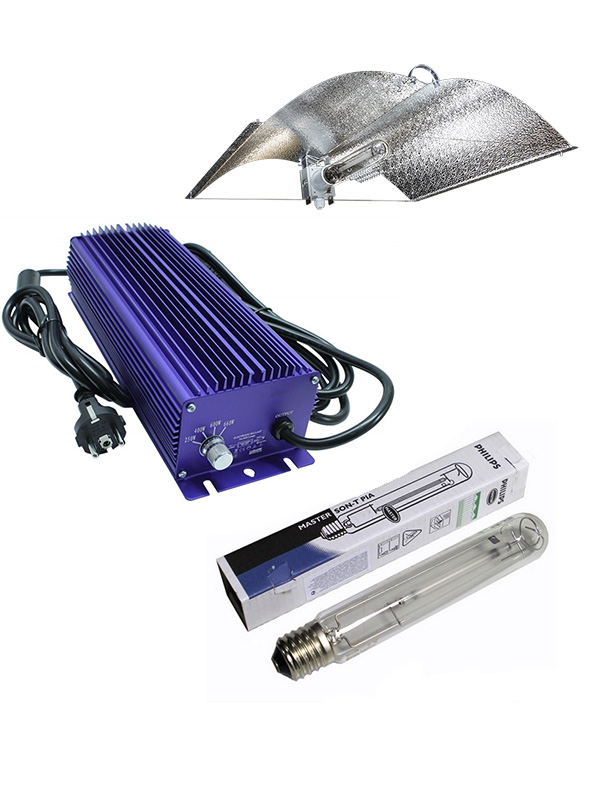
An NDL lamp consists of a Ballast, a Reflector and a NDL lamp. In the LED grow lamps, everything is already integrated.
The reflector of the lamp should be set up so that all plants are optimally illuminated. Special lamp hangers that can be easily adjusted in length and adapted to the height of the plants are best suited as fixings.
If the ballast is located directly on the lamp, the entire lamp should be secured with several hangers. However, most NDL lamps have an external ballast that is best placed outside the grow box and elevated. There are some advantages to positioning the ballast outside the box: firstly, the heat generated by a ballast does not enter the grow room and raise the temperature too much, and secondly, the ballast is more protected from water splashes etc. outside.
Make sure that the ballast is always on a fireproof base, as it can get quite hot. In our article "The lighting of cannabis plants". you can read more about this topic.
When the plants are later placed in the grow room, it is particularly important to ensure the correct distance between the plants and the NDL lamp:
- 400W NDL/MH lamp: 30 cm distance
- 600W NDL/MH lamp: 35 cm distance
- LEC 315W: 45-50cm distance
- LEC 630W: 50-55 cm distance
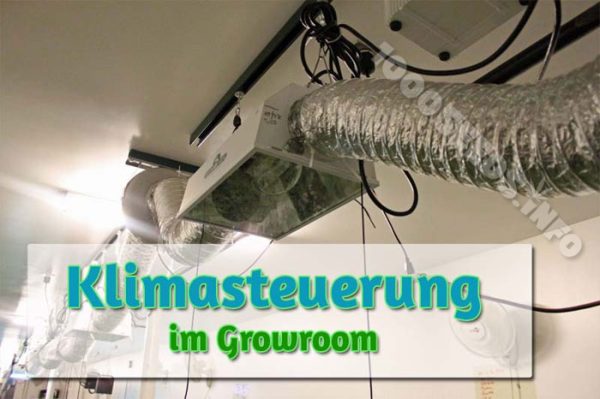
The ventilation
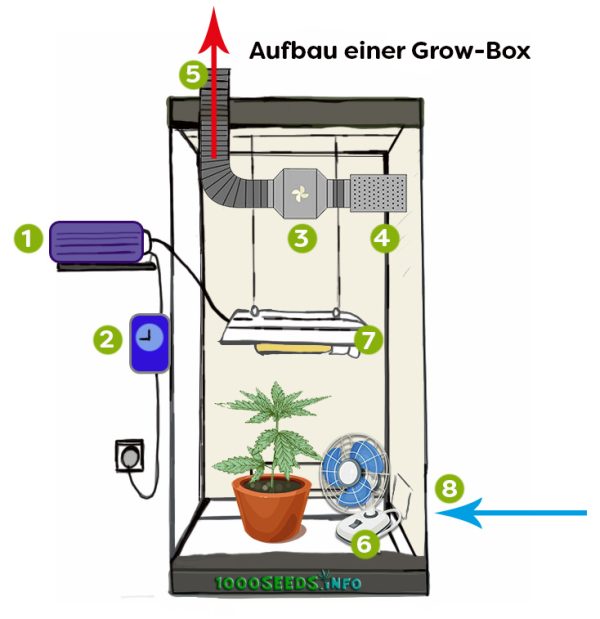
1 ballast: should always match the wattage of the lamp (e.g. ballast 600W with NDL lamp 600W)
2 Timer: controls the daily lighting duration
3 fans: tube fan/scroll fan/screw fan
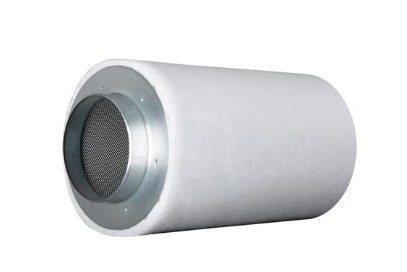
4 Activated carbon filter (AKF): takes away the odours
5 Exhaust air pipe: leads outside
6 Recirculation fan: with swivel function or rotating box fan
7 NDL lamp/LED panel
8 Supply air: Inlet for fresh air
A Fan (e.g. ufo fan, tube fan) ensures that warm stale air and moisture are removed from the grow room and new fresh air is brought to the plants. Plants need CO2 for photosynthesis. With the help of the fan, the humidity is controlled and brought to an ideal level. Without the fan, the humidity in the grow room would often become too high, especially at night. If the humidity is too high, the plants can no longer develop optimally and conditions are created so that harmful fungi can spread. Therefore, good ventilation of the grow room is one of the most important points in indoor growing.
Hint: When working with and using electrical devices such as ballasts, fans, etc., always ensure that there is sufficient distance to water or a tank. Make sure that the equipment does not get wet or splashed when watering.
You can find more details about ventilation and the right strength of the fan depending on the size of the room in this article: "The right ventilation for the grow room"In any case, use a sufficiently sized fan and the right lighting to achieve the best results.
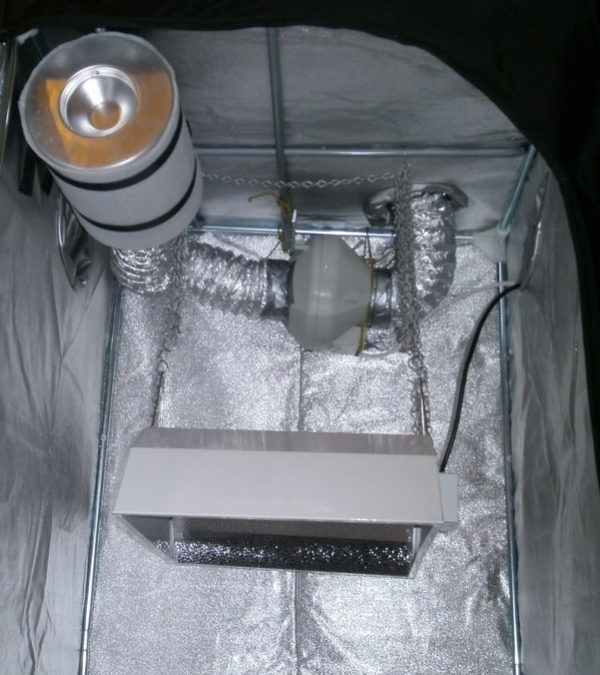
Exhaust air installation
In almost all grow rooms, fans are needed for the exhaust air and are also Activated carbon filters (AKFs) necessary to remove odours. You should not save money in the wrong place. The ideal climate and the right amount of discretion can be crucial factors to successfully complete and protect a grow.
If too many odours are coming out of the grow room, either a stronger fan or a larger ACF must be used. So both the fan and the ACF can be too small. Odour problems can occur if the two do not go together and the fan is too strong for the activated carbon filter, for example.
The exhaust air in the grow room is often a particular challenge. It is best if you can create an exit to the outside and transport the used air directly outside. Do not direct the exhaust air into the room where the grow box is located. This way you can save the whole climate and the plants would only stand in their own stale air without any real air exchange. On the other hand, the grow room or grow tent needs an air inlet through which fresh air can continuously flow into the grow room. Because warm air always rises, the fan and the exhaust air are located at the top near the ceiling of the grow box while the inlet for the supply air should always be at the bottom.
Ventilation pipes are fixed to the fan and the AKF with the help of Fabric tape, Aluminium tape or Tube clamps. Cannabis plants thrive on a perfect climate and plenty of fresh air, just as they do in the wild. Make sure that the supply air consists of sufficient fresh air, if you cannot create a direct connection to the outside, ventilate very often. By the way: Cannabis plants themselves do not like smoke. So the air should not be smoky either.
Exhaust pipes can in some cases be routed into the chimney. However, this requires an existing opening in the chimney and/or some expertise and tools. Be careful if you do not know how to do this yourself and are considering removing existing installations or making holes in the chimney. This could potentially cause damage or draw unnecessary attention to yourself. Maybe there is another possibility to realise the exhaust air?
Neutralise odours
The odours of the plants must be neutralised before the air leaves the grow room. The best and most common way to do this is to use an activated carbon filter. This is connected directly to the fan. Activated carbon filters can be quite heavy and need to be attached to the ceiling of the grow box with extra hangers or nylon straps. An activated carbon filter for an average grow room of 80 x 80cm or 100 x 100cm needs a capacity of about 340m³/hour.
In addition, the use of odour-neutralising agents and sprays from ONA, ZerumPro is recommended, e.g. for harvesting or when the plants are taken out of the box.
Install recirculation fans
Every grow room needs a swivel fan, a wall fan or a rotating box fan, especially during the flowering phase. In addition, the use of a clip fan is recommended to ensure optimal lift circulation. For each 400W lamp, at least one swivel fan or Box fan with a diameter of 30cm is required.
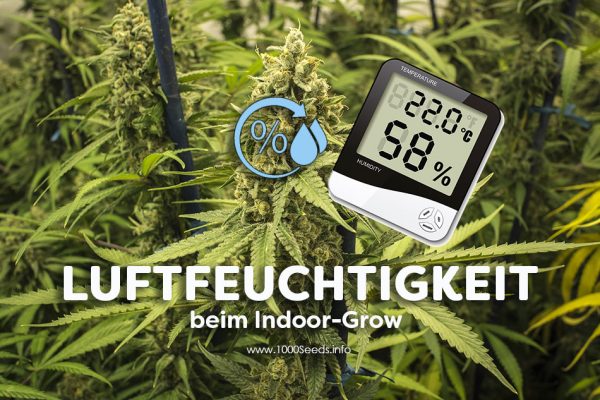
Install a thermohygrometer
Install at least one Thermohygrometer to control the humidity and temperature in the grow room. Digital hygrothermometers are cheap, relatively accurate and they provide the important data at a glance.

Daily monitoring of temperature and humidity helps you to gain experience and develop a feeling for how the fan should be controlled so that humidity and temperature are within the desired range. This can be done with a timer (e.g. the fan switches on every 10 minutes or the fan runs continuously). You can control and adjust the temperature and humidity even more reliably and easily with the help of a climate controller.
Important is: the parameters humidity and temperature are largely influenced by the control of the fan.
- Ideal temperature in the flower room during the day: 24° C
- Ideal temperature in the flowering room at night: 18-21° C
- Humidity should not be higher than 50% during flowering (day + night).
- Ideal temperature in the growing room during the day: 24° C
- Ideal temperature in the growing room at night: 18-21° C
- Humidity: 60% (day + night)
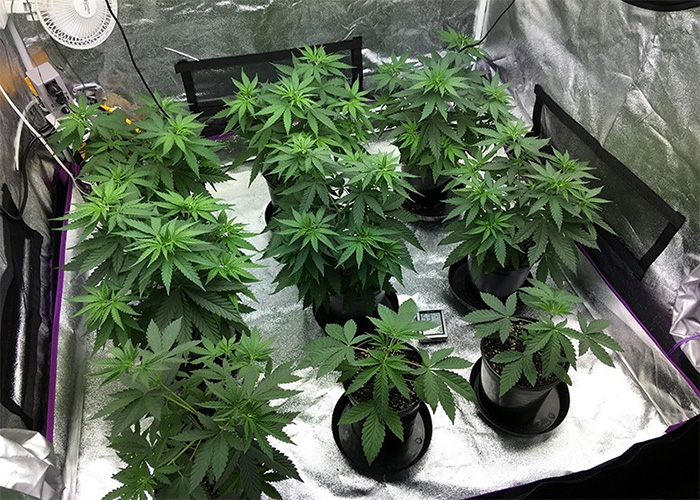
Growing space and flowering space
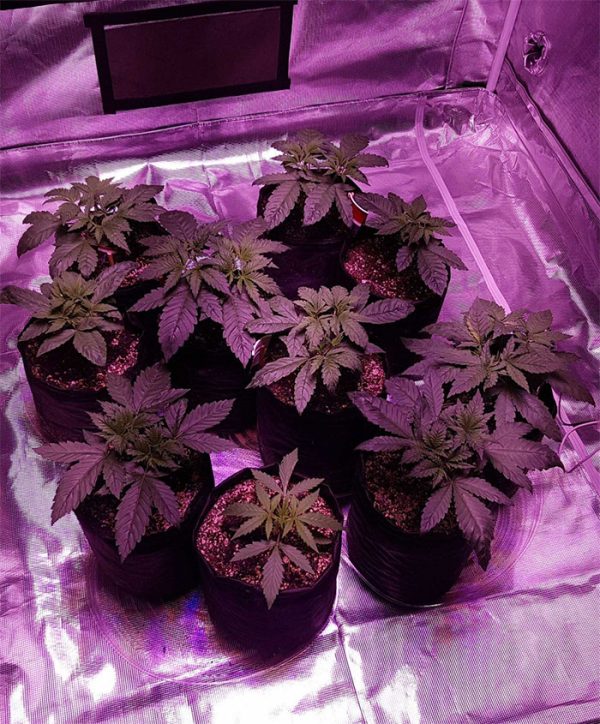
Some growers set up a smaller grow box for the vegetative phase, as well as for mothers and cuttings, and a larger one for the flowering phase, or use a grow tent that already has 2 chambers, like the Lodge R 2.6 grow tent from Secret Jardin. This setup allows the grower to harvest continuously. Depending on how it is planned, it can be harvested once a week, for example. Each time a plant is ripe and taken out of the grow room, a new small plant or cutting is placed in the flowering chamber. This method is a little more time-consuming, but also very productive and can even increase yields by up to 20%.
If you plan 2 separate grow rooms, one for the growing phase (seedlings, cuttings and mothers) and one for the flowering phase, you can harvest regularly. The grow room is lit 18-24 hours per day, while the flower room is lit 12 hours per day. To get the most out of your growing space, the flowering space should be 3 to 4 times larger than the growing space.
A grow room with an area of 60 x 60cm can produce enough cuttings or seedlings to fill a growing space of up to 2.5 x 2.5m.
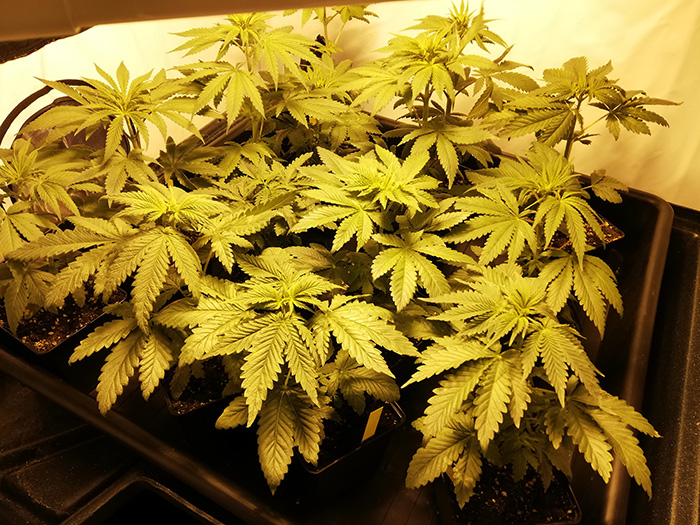
The grow room for the vegetative phase can be equipped with TLED, ESL- or CFL lamps can be illuminated. For a grow room of 60 x 60 cm, we recommend one 150-200W ESL lamp or 3 TLEDs.
Plan storage for tools, accessories and fertilisers near your grow room.
The current
Make sure that the circuit to which devices such as fans and lamps are connected is not overloaded. Roughly speaking, no other high-wattage electrical appliances such as washing machines, hoovers, hair dryers, dishwashers, etc. should be connected to the socket where you plug in the lamp or fan. It is usually safest to use 2 separate sockets for a grow on an area of 80 x 80cm to 120 x 120cm.
After you have set up everything, the first plants can move in and nothing stands in the way of your gardening happiness.