

How do I germinate cannabis seeds correctly?
I. Possibility to germinate cannabis seeds - with paper towels:
Step 1
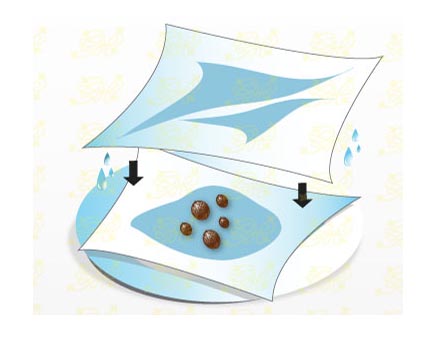
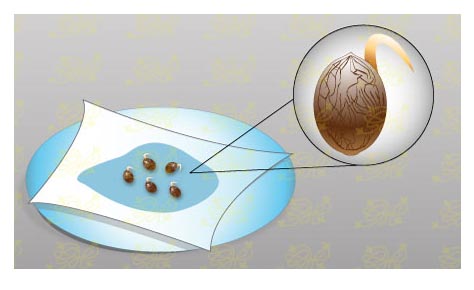
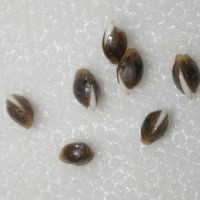
Place a wet piece of Zewa/paper towel on a clean plate. Carefully place the seeds on this with disinfected tweezers or a small spoon. The seeds should ideally not touch each other. Place a second piece of wet paper towel on top of the cannabis seeds. The seeds are now between the two wet pieces of paper towel. The pieces of paper should be wet with cold water. It is best to use a tear-proof kitchen paper, which is more suitable for handling than toilet paper.
Step 2
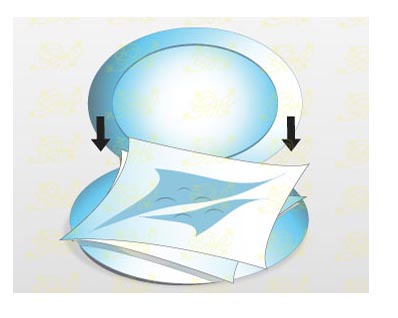
Now carefully cover everything (e.g. a second deep plate over it) and put it in a warm(22° C-25°C), clean and dark place. Lower temperatures below 20°C can delay germination while temperatures above 30°C lead to poorer germination results. Care should be taken to ensure that the paper towels remain well moist and do not dry out, otherwise they will not work. If the cloths become too dry during the germination process, simply spray the cloths with the seeds with water using a plant sprayer. Do not touch the cannabis seeds with your fingers, as they could become infected with germs and die prematurely before anything develops. In this phase, the growing plant is particularly susceptible to external disease, so cleanliness and disinfection of all tools and objects used is extremely important.
Step 3
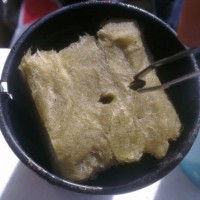
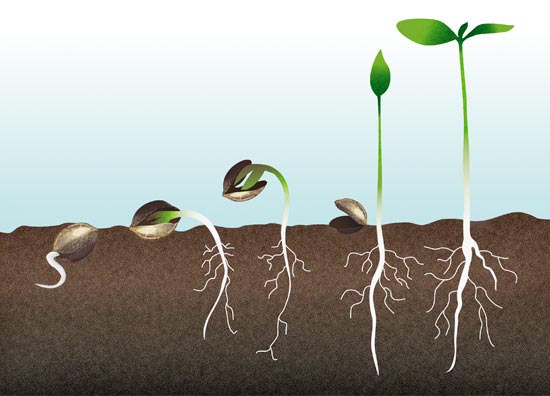
After 48-78 hours, the seeds will pop open slightly and a small white tip will be visible. Now the seeds should be placed carefully and with disinfected tweezers into the planting medium. This can be soil, coco or rockwool, depending on the substrate you are growing with. We recommend that beginners work with soil that has hardly been pre-fertilised. Ligh-Mix. The cannabis seeds should only be placed about 0.5 cm deep in the soil. Place a very thin layer of soil over the seeds. The seeds should not be planted too deep, if you overdo it the plant can be delayed developmentally or even die before it can find its way up. When the seeds are placed in the soil and lightly covered with soil, they are watered with a maximum of 2 tablespoons of water. The soil should now be moist, but never wet. From now on, water the seeds drop by drop or with a plant sprayer so that the soil is always moist but not wet.
Except for the automatic cannabis varieties, use a small pot with a diameter of only about 6cm for the seeds. A pot that is too big stores too much water for too long, while a Babay plant has no way of getting rid of this water. So, especially with beginners, there are regularly problems, the soil is much too wet, the soil climate is not right and the plant becomes a little yellow thing that does not grow. The plants are overwatered, have contracted a fungus and the roots get too little oxygen and turn brown and rotten because too much water in the pot leaves no room for sufficient oxygen.
Well, to cut a long story short, first use a small pot and ideally add a 3cm layer of expanded clay or perlite to the bottom of the pot to ensure optimum drainage and avoid waterlogging. The first start is especially important for the plants, especially here many mistakes are made and then the cannabis plant develops from the outset under poor conditions, which usually can no longer be compensated for in the entire course of its life. With a few small precautions, such as using a small pot and a drainage layer of expanded clay (Europepples, Hydrocorrells), you can avoid a lot of trouble in advance and enable a good development.
Step 4
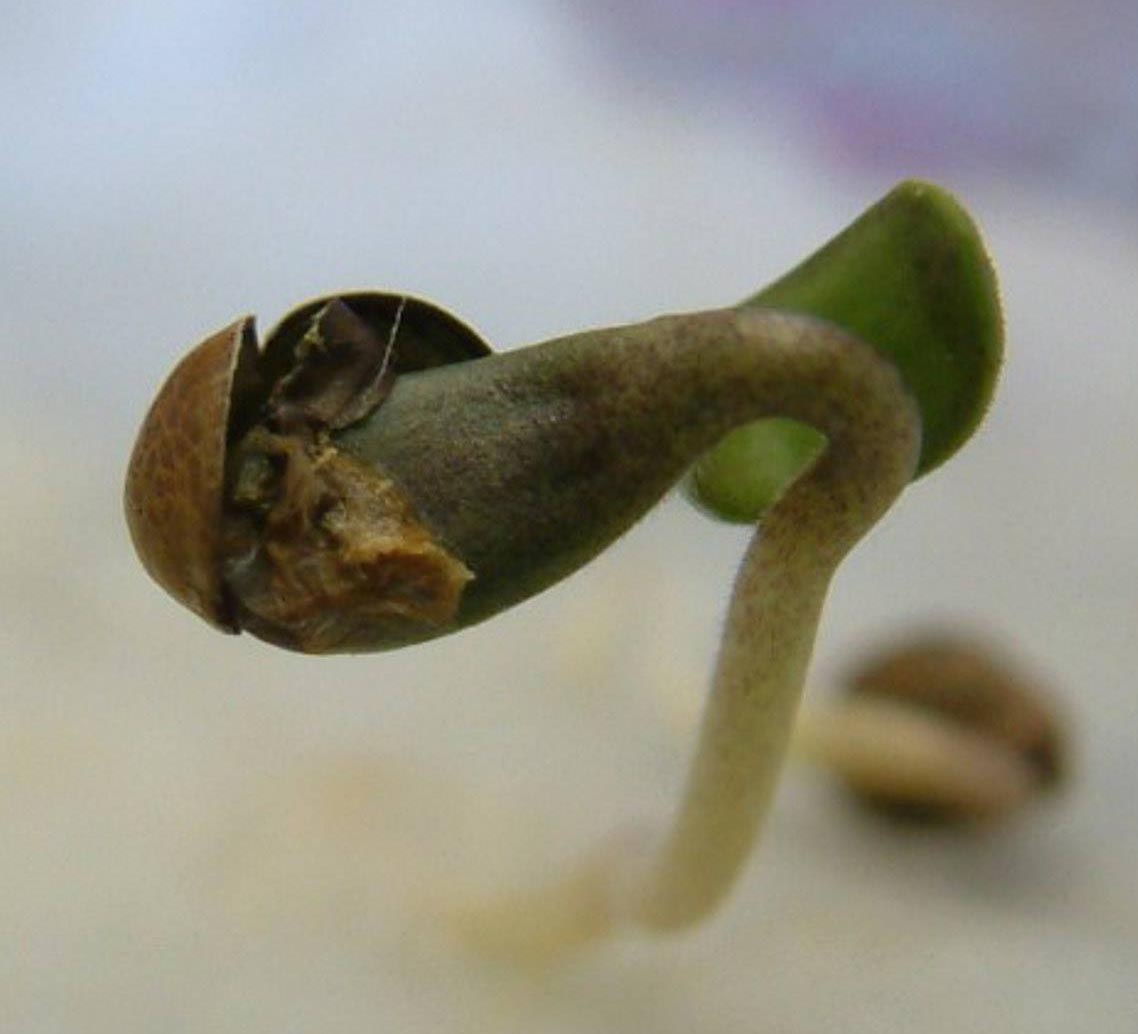
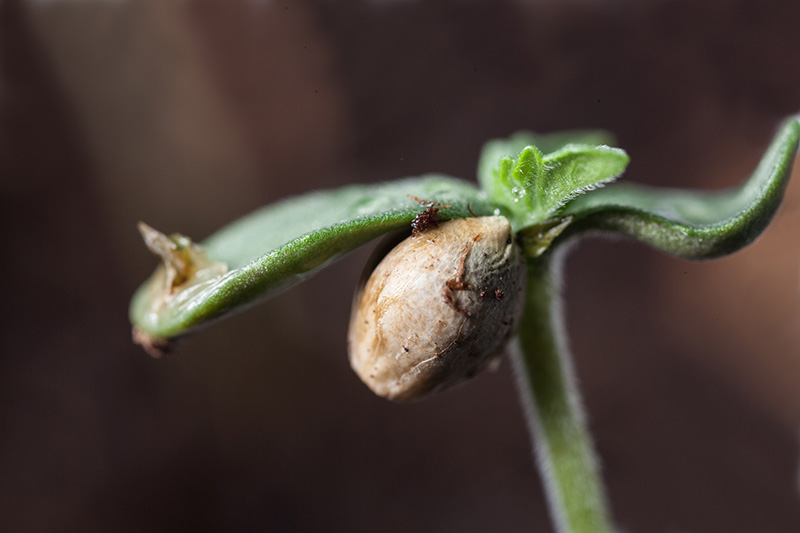
It can now take 5-6 days until the first seedlings emerge from the soil, be patient, it takes time. During this time you must not dig up the seeds to see if everything is ok or if they will come out soon, this can infect the seedling and cause extreme damage. When the time comes, you will see the soil bulge a little and a short time later a small loop will peep out. In the beginning, the little ones often still have their seed coat on their heads.

As soon as the seedlings emerge from the soil, they should immediately be placed under a fluorescent tube, plant energy-saving lamp or in sunlight. The distance from the plants to the energy-saving lamp or neon tube should be max. 5-10cm. Since energy-saving lamps or fluorescent tubes do not generate heat, a close distance is possible. After a few days, the young plants can be placed under a MH lamp (with blue spectrum for growth). This of course has even more light intensity and the plants grow bigger and faster, but you can also continue to cultivate the plants under neon tubes or energy-saving lamps during the growing phase, although the productivity is not as high as with MH lamps. Later in the flowering phase, an NDL lamp with ballast will be indispensable if you want to achieve visible and potent yields indoors. But until then, it's still a little 😉 longer.
2nd possibility to germinate seeds - in a glass of water:

1.) You can also put the seeds in a glass of cold water for several hours. Cold water because it contains more oxygen than warm water.
2.) After approx. 24-48 hours, carefully remove the seeds from the water, preferably using a disinfected spoon or disinfected tweezers, place them in soil, jiffies or rock wool and lightly cover with a thin layer of soil etc. (insert the seeds approx. 0.5cm deep into the soil, not deeper or too deep, otherwise there could be problems).
3.) Now place in a warm and bright place. The room temperature should, if possible, not be below 20 degrees.
4.) Moisten the freshly planted seeds with a few drops of water. In the following days, the planting medium in which the seeds are should be kept moist (but not wet) and warm.
Germinate Cannabis Seeds
<<mehr Grow Tipps im Growlexikon>>